
“Handel Match” feature is available as beta version now.
Revolutionize the common sense of product registration on Shopify with a groundbreaking feature that allows you to complete to add images to all product pages with just one touch.
The Handle Match feature is a function that adds product images with file names that comply with the rules on the product page.
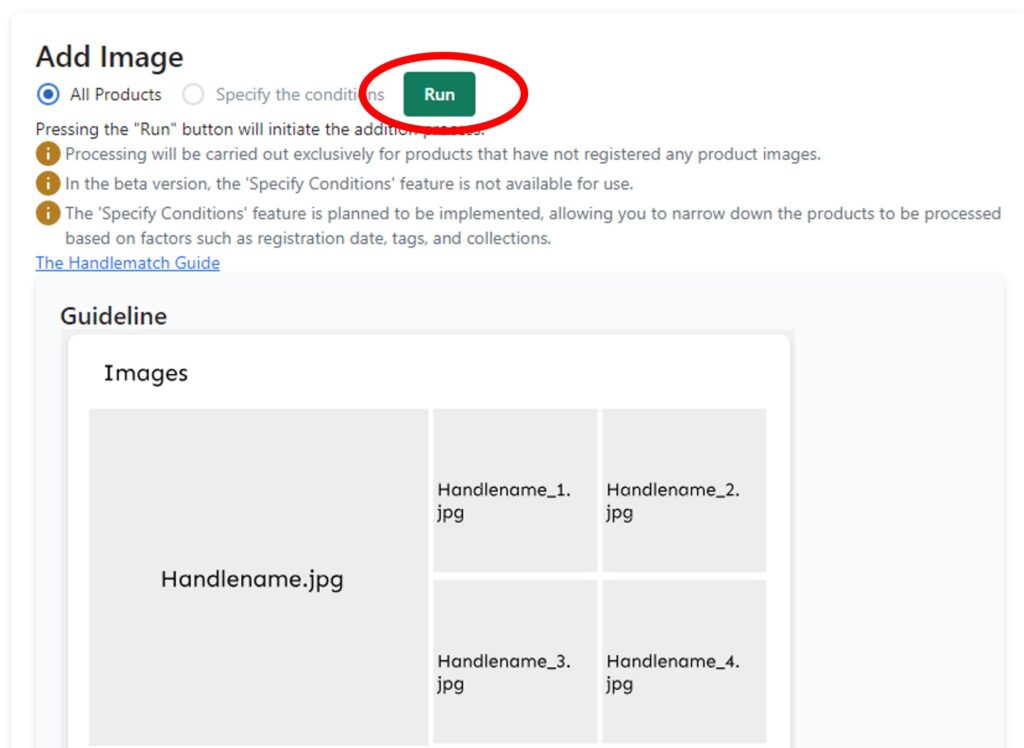
The operation in the app is; “All Products” or “Specify conditions”, then click the “Run” button.
That’s all it takes.
Preparation
Assign file names according to the rules
Once you have created the product image files, please assign file names following the rules below.
| Order displayed on the product page | Image file name | Example |
|---|---|---|
| 1st image (optional) | Handle name.extension | Example.jpg |
| 2nd image onwards (required) | Handle name_display number (1 to 255).extension | Example_5.jpg |
Example of a product page after adding images

Note:
- Even if the first file (e.g., Example.jpg) is missing or file names are not in sequential order, it can still be added without any issues. For example, if there are only three files with the names “sample_1.jpg”, “sample_2.jpg”, and “sample_4.jpg”, they will be added in ascending order based on the numbers.
- If you want to change the file names in bulk, it is convenient to use the freeware introduced in this article. If you have any difficulties, please email to us, “info@marketdive.jp”.
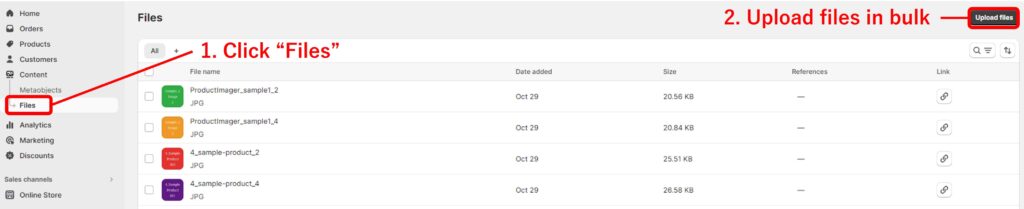
Upload Images to a Shopify Store
Save the images in the “Files” section of the Shopify admin page.
With this, the preparation is complete.
Operation in the App
Add images to all products
Click the ‘Run’ button. That’s all.
Note:
- This feature only applies to products without added images. For products with images, please delete all images from the product page and then re-add them using this feature. To delete registered images in bulk, please use the standard CSV provided by Shopify.
- Variant images cannot be added using this feature. If you wish to register variation images, please use the “CSV Registration” feature of this app.
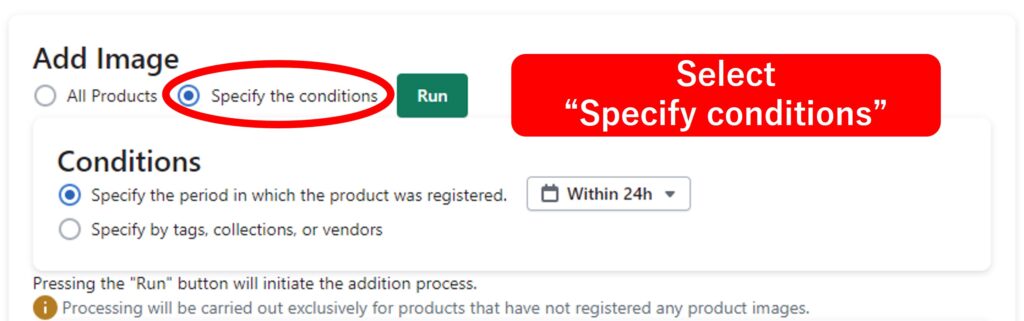
Specify products to add images
This is a feature that allows you to narrow down the products for which you add images by specifying conditions such as product tags, collections, and the registration period.
Specify the registration period for the products
This feature allows you to add images only for products registered within a specific period. You can freely select the period using the calendar. You can also choose the period from the options on the left side of the calendar.
For example, if you want to specify products registered from November 1st to November 10th, you would make the following selections.
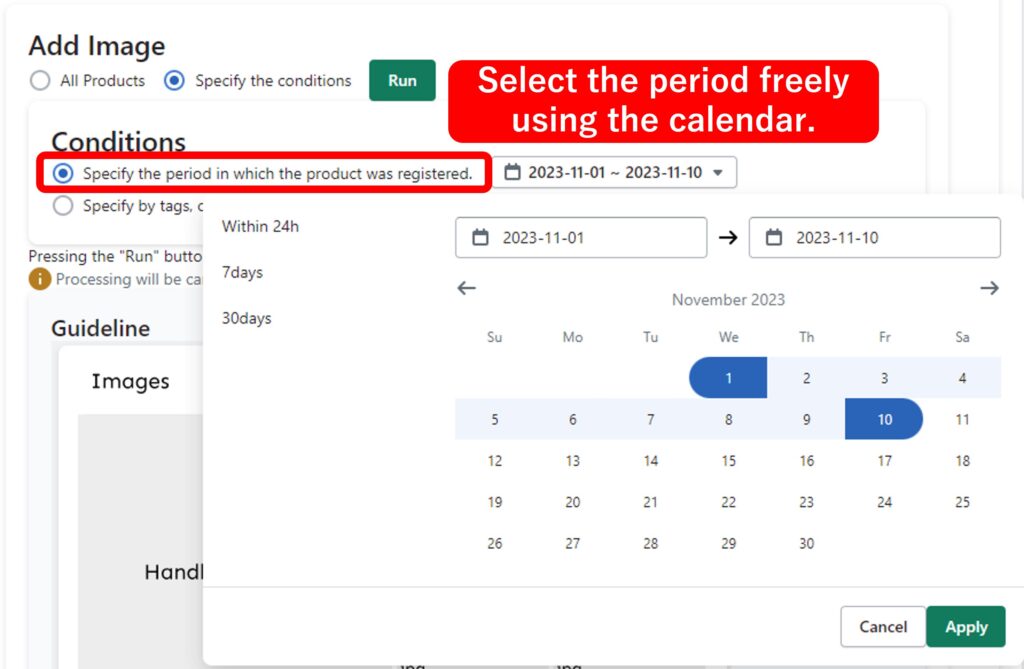
Once you’ve specified the period, click the “Run” button. That’s all there is to it.
Specify by product tags, collections, or product vendor
This feature allows you to add images only for products that meet certain conditions, such as product tags, collections, or product vendors.
First, choose one of the following:
• All conditions: You can add images for all products that meet the specified conditions.
• Any condition: You can add images for any product that meets at least one of the specified conditions.
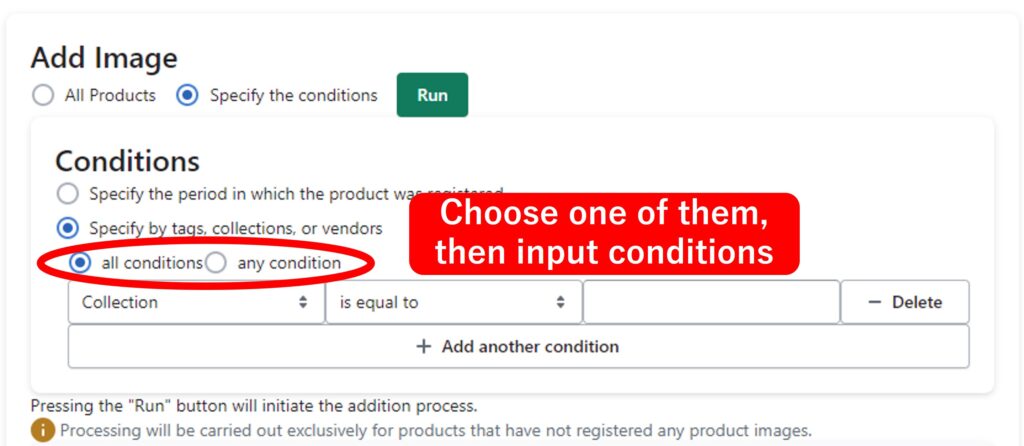
Next, follow these steps to specify conditions:
- Select the condition you want to specify: Choose from “Collection,” “Product Tag,” or “Product vendor”.
- Choose the matching method: Choose one of the following four options:
- is equal to
- is not equal to
- contains
- does not contain
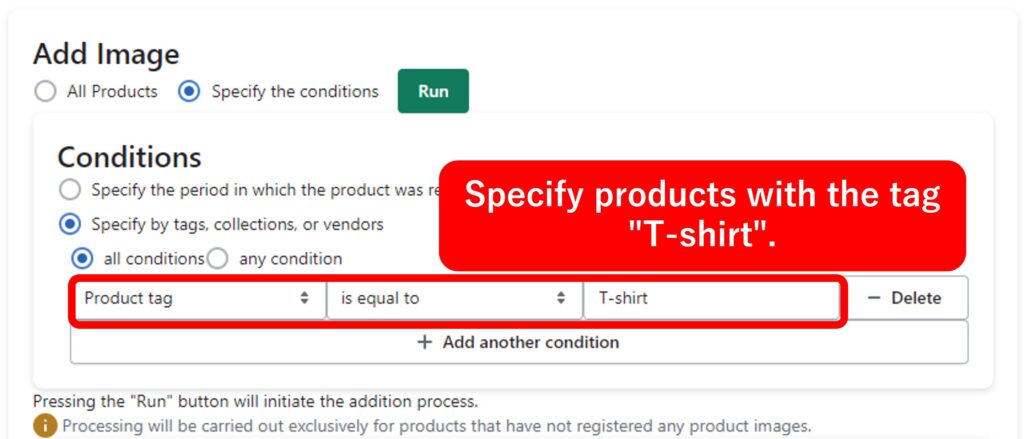
- Enter the condition: Enter the name of the specified “Collection,” “Product Tag,” or “Product vendor”. Ensure that the string is an exact match.
Example: If you want to specify products with the tag “T-shirt”
If you want to add or remove conditions:
• Click “Add another condition” to add a new row.
• Click “Delete” to delete a row.
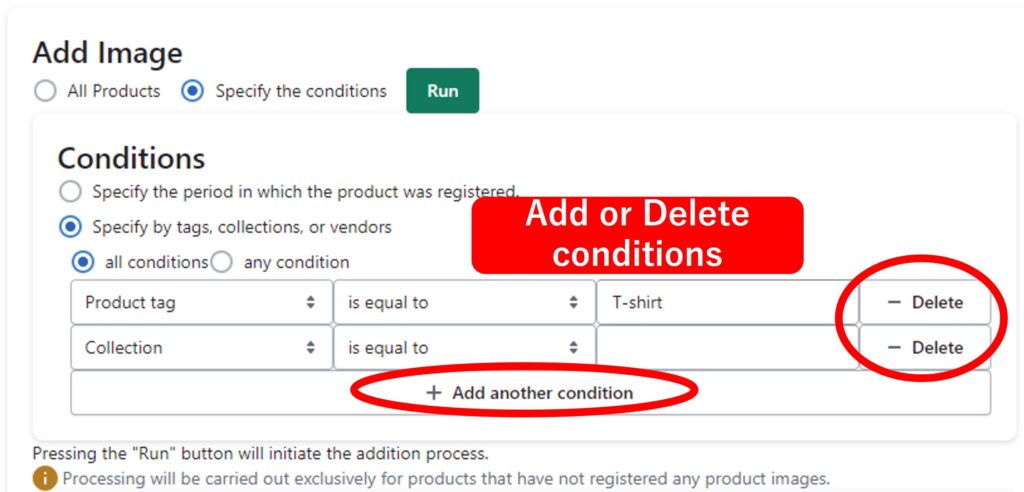
Once you’ve specified the conditions, click the “Run” button. That’s all there is to it.